3 min read
Automation Trends: Top APIs to use in 2023
An application programming interface is all around us and will be even more in the trend of automation in 2023. They are used to access data that...
We used Crisp for a long time at Meta API, but since we use HubSpot for our Marketing & Sales teams, it makes sense to move our support to HubSpot Chat.
HubSpot Visitor Identification API is used to add a name on a user inside HubSpot Chat, and you need a backend for the implementation. This method prevent identity spoofing but can be hard to implement in some cases!
Instead of adding more routes and complexity to our existing API, we use one of our Spell (think serverless function) to implement it.
Bonus: we add a cache to reduce amount of API calls 😎
Back then, doing user identification with Crisp was very easy:
With HubSpot, you have to deal first with this schema:
 For more fun: https://developers.hubspot.com/docs/api/conversation/visitor-identification
Wait, what? I need a back-end for a chatbot?

Okay, after a deep breath, it makes sense: they want us to use our backend to make this API call after user authentication. This prevents spoofing identity inside a chatbot.
Even Crisp update their documentation with this concept.
Ok then, we’ll need to use our backend to implement it... but let’s continue with this scenario.
For example, if you want to add this chatbot on a landing page, and you have already the user email address: you don’t care about authenticating your users. You want to improve the experience for your users even if you know there is a risk of spoofing.
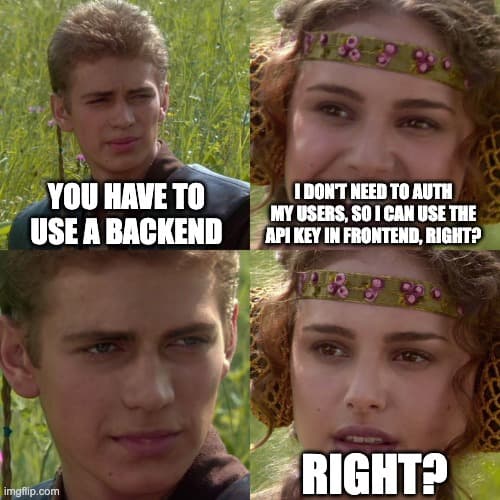
Nope, bad idea! Your HubSpot API Key is very private and you shouldn’t expose it on a frontend. Unless, you’ll have some surprise on your HubSpot account few days later...
Brace yourself, here is a solution.
You can use a serverless function to make this call for you. This way, your API Key won’t be exposed, and you’ll be able to retrieve the token.
We’ll use a Spell at Meta API to do it. You won’t have to worry about deployment, monitoring and security: everything is managed by us.
The best part is that you don’t have to worry about code also: I’ll give a link to an Open Spell at the end of this article with everything already prepared for you ❤️
First, we’ll implement the most basic code possible. For doing this, we need:
To get some entry parameters
Make an API call to HubSpot to generate the token
Return the token
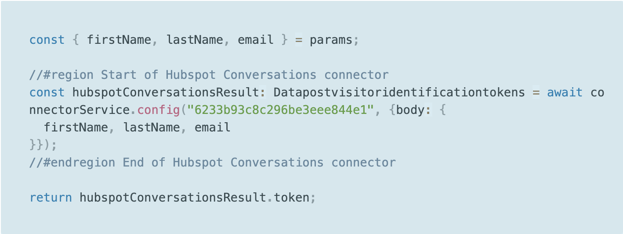
Here is the code and a capture of the interface
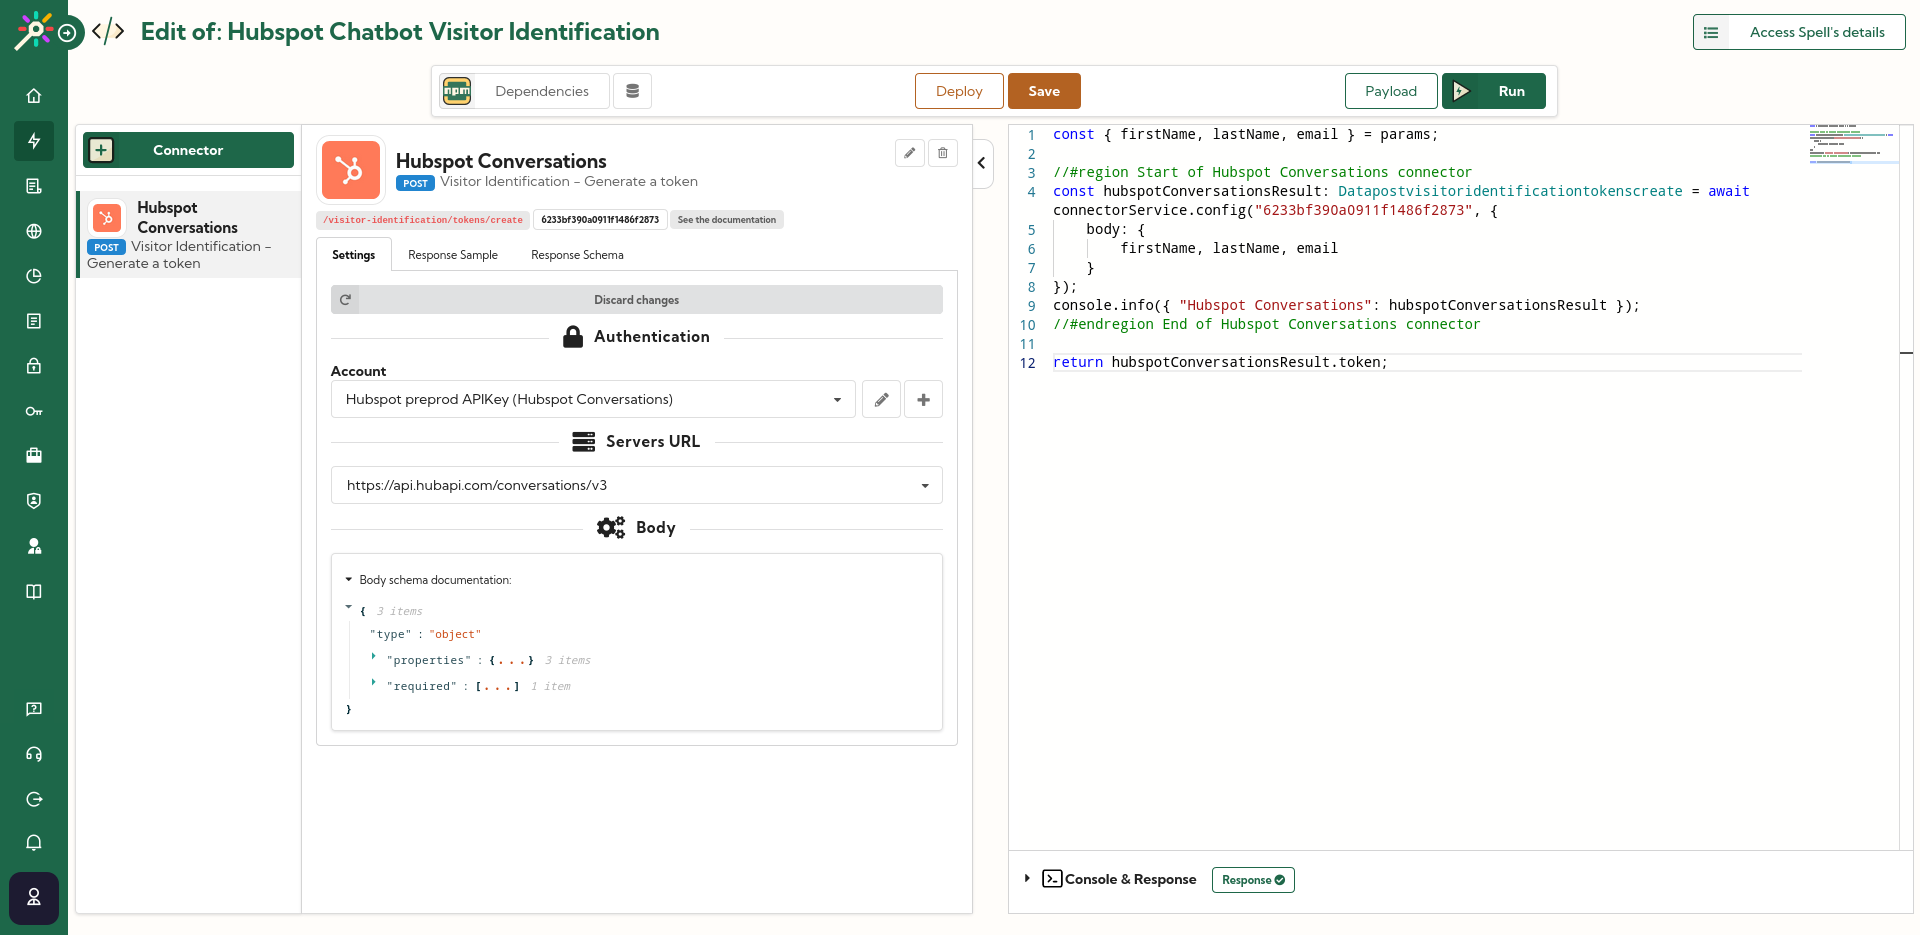
A Spell edition interface
Pretty small, right? I’ll explain everything.
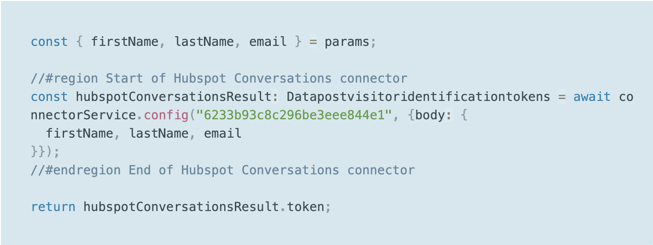
First, you have the parameters (line 1): all parameters sent to a Spell will be stored inside the params variables. So I spread some variables from it.
Then, you’ll have the connector configuration (line 3 to 9). The connector generate this snippet of code and you just have to copy/paste it to use it. Then, I added the variables inside the body. On your left, you have the connector configuration and I’ve configured the authentication.
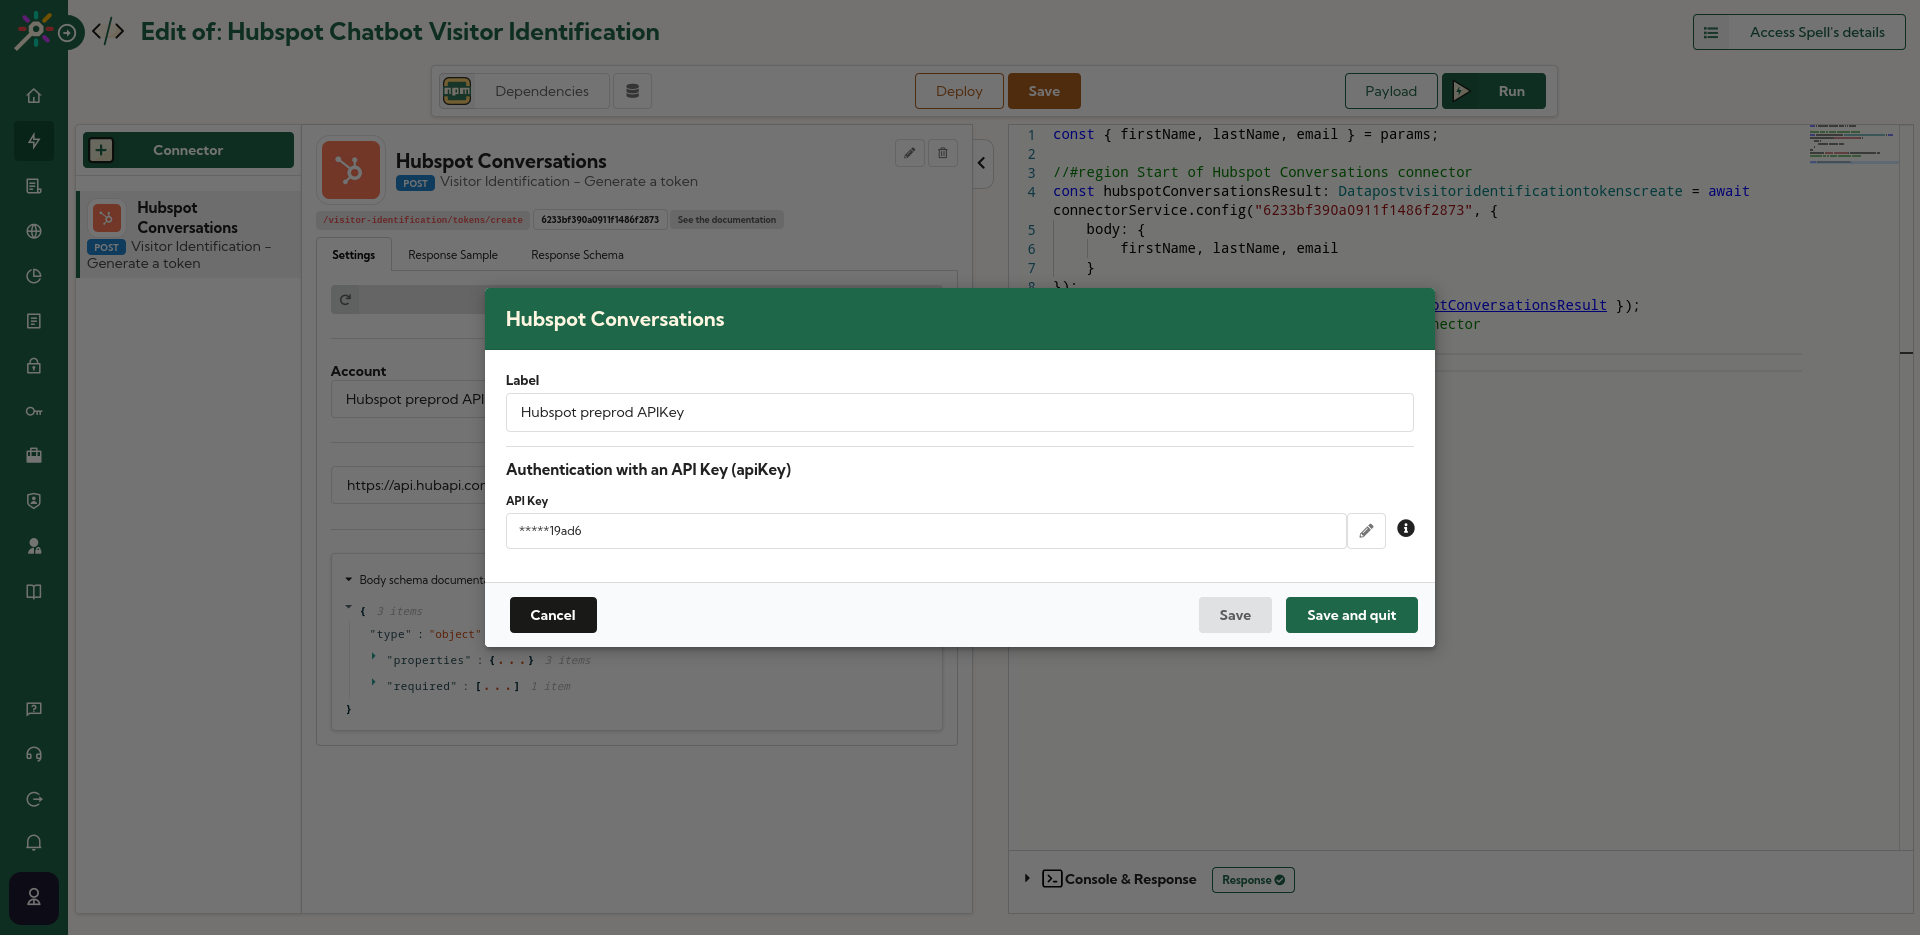
Adding or editing an API key inside a connector
This is where the API key will be safely stored.
Then, I return the token using return (line 12). We have implemented API’s schema autocompletion directly inside our code editor: so it’s very easy to figure out what I can return.
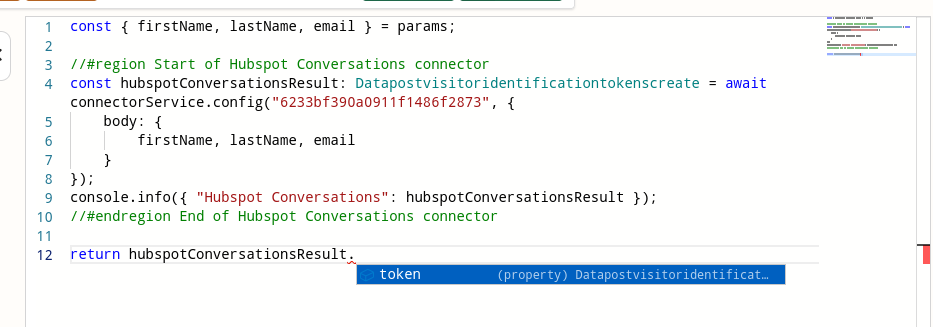 Autocompletion done on a connector’s result
That’s it! 🥳 Our implementation is done. Let’s run it to check the result:
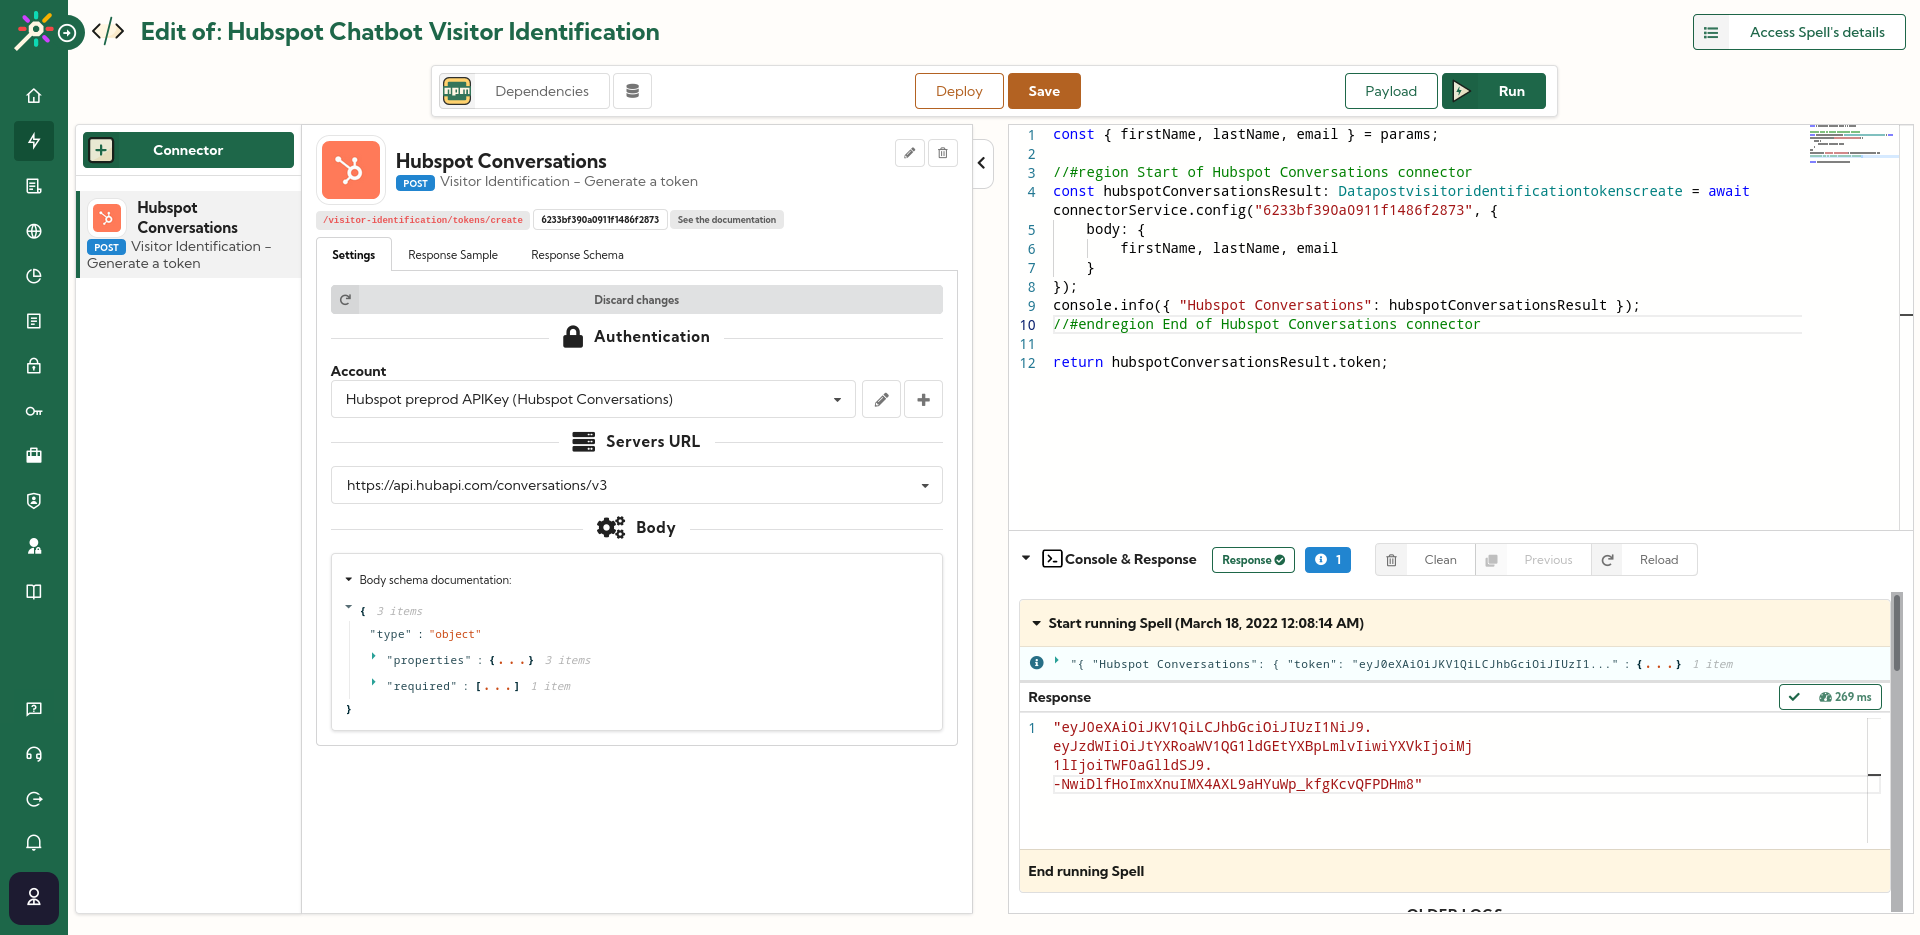
Great! We have our token.
I don’t have to manage errors or notification: everything is done by the platform automatically.
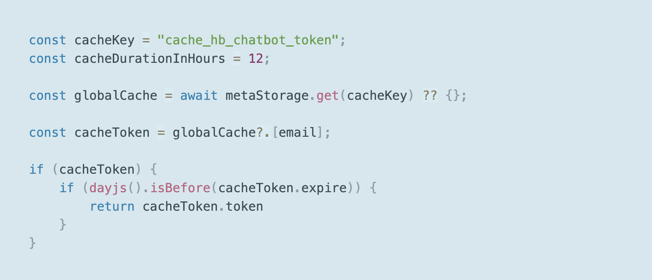
Let’s improve it and add a cache! Each generated token are valid during 12 hours: so we’ll store them into our key/value database (Meta Storage) and send them back before sending the request if they are not expired.
Here is the final result:
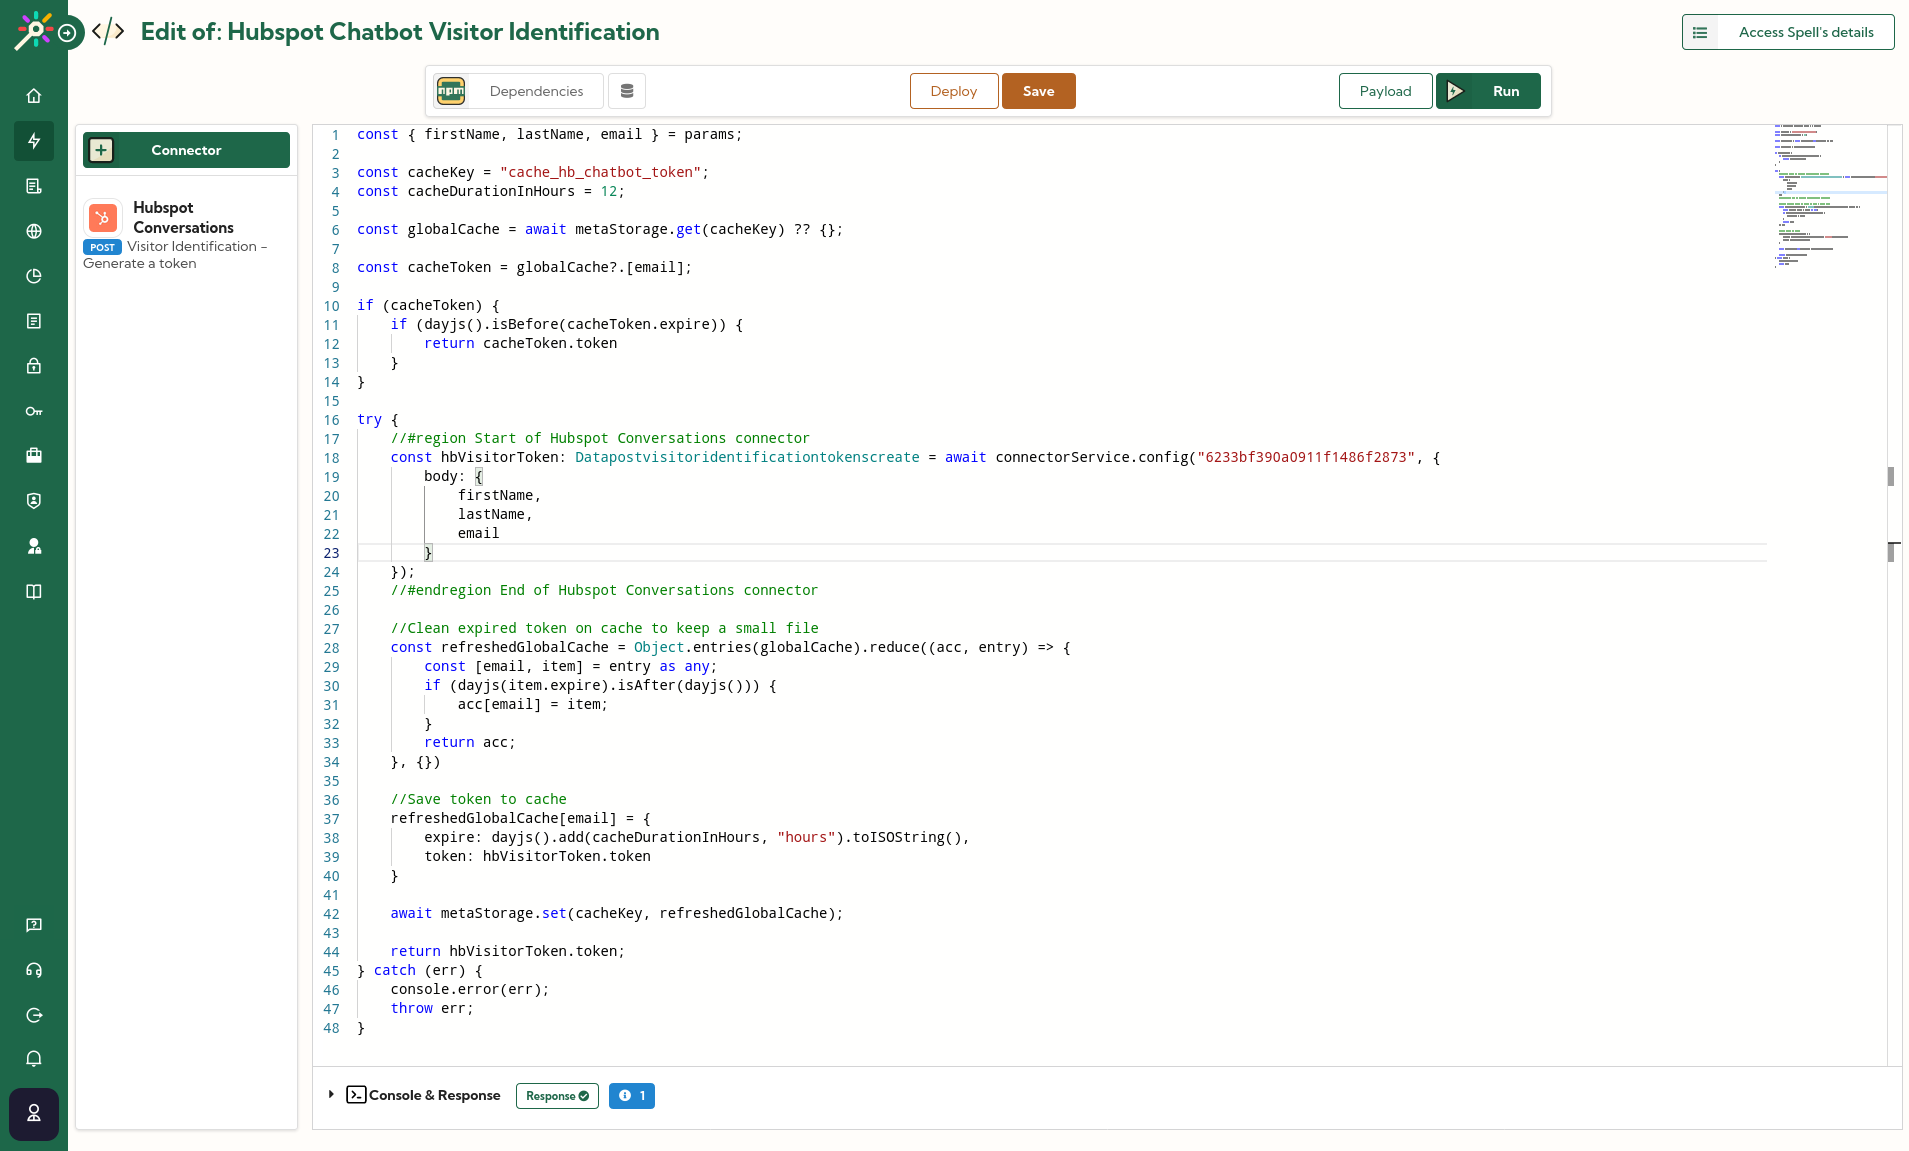
Before the request, I retrieve inside the Meta Storage my object that will contain all the stored token.
I use the user’s email as a key. I’ve added dayjs as an NPM dependency to check the date.
If the token is not expired, I return it.
After the request, I will first clean the cache
That’ll help keep my stored object as small as possible. I don’t want that cache growth indefinitely.
Then, I store my new token inside
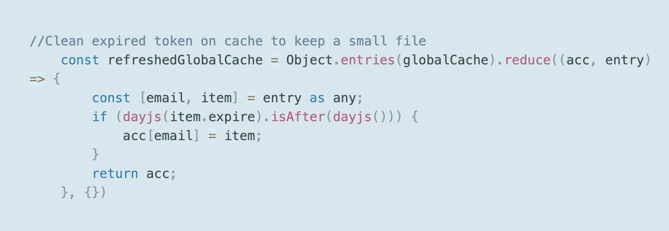
And voilà!
You want to use it, here is the link : https://dashboard.meta-api.io/open-spells/Hubspot-Chatbot:-visitor-identification-62337bd4f8456d438ef2bea2
There is a good reason why you need to use a backend to add visitor identification on HubSpot Chat: preventing spoofing user’s identity and mislead your team to gain sensitive information.
But in some cases, you don’t need this kind of security and prefer to have identity only to ease users experience and data for your team.
The serverless approach is the most effective one and, with Meta API, we provide a way to manage both serverless and all maintenance stuff, like monitoring and alerts.
Your journey don’t stop here and you can go even further: you can add more APIs, for example send a request to your own API to create a new contact or notify your team on a specific messaging platform, like Discord or Teams.
Let’s get started with our ready to use Open Spell and explore all the potential of Meta API.
Have an API journey!

3 min read
An application programming interface is all around us and will be even more in the trend of automation in 2023. They are used to access data that...

2 min read
You may encounter errors while creating your automation with Meta API: that’s part of any coding activities (yes, you’re a coder when you use Meta...

4 min read
Making questionnaires can be very useful for your company. Indeed, there are many types of surveys that allow you to get precious information. For...